To Contact Anchor Group, Please Provide The Preferred Method Of
Communication You Would Like To Use. You Can Share Your Contact
Information, Such As Your Email Address Or Phone Number, And We Will
Make Sure To Pass It On To The Appropriate Department At Anchor
Group.
Factory
To Contact Anchor Group, Please Provide The Preferred Method Of
Communication You Would Like To Use. You Can Share Your Contact
Information, Such As Your Email Address Or Phone Number, And We Will
Make Sure To Pass It On To The Appropriate Department At Anchor
Group.
Video
To Contact Anchor Group, Please Provide The Preferred Method Of
Communication You Would Like To Use. You Can Share Your Contact
Information, Such As Your Email Address Or Phone Number, And We Will
Make Sure To Pass It On To The Appropriate Department At Anchor
Group.
How to Test Car AC Compressor: A Step-by-Step Guide
Jun 04, 2024
Testing your car’s air conditioning (AC) compressor is an essential step in diagnosing issues with the AC system. The compressor is the heart of the AC system, and if it’s not working correctly, the entire system can fail. This guide provides detailed instructions on how to test the AC compressor to ensure it is functioning properly.
1. Visual Inspection
Check the Drive Belt
Locate the Belt: Open the hood and locate the drive belt connected to the AC compressor.
Inspect for Wear: Look for any signs of wear, cracks, fraying, or looseness in the belt.
Tightness: Ensure the belt is properly tensioned. A loose belt can slip and fail to drive the compressor efficiently.
Inspect the Compressor Clutch
Clutch Condition: Examine the clutch for any physical damage or wear.
Clutch Operation: With the engine off, manually turn the clutch to check for smooth movement.
Look for Leaks
Refrigerant Leaks: Look around the compressor and surrounding areas for oily residue, which can indicate refrigerant leaks.
UV Dye Test: If a UV dye has been used in the system, use a UV light to check for leaks.
2. Check the Electrical Connections
Inspect Wires and Connectors
Check for Corrosion: Ensure all electrical connections to the compressor are clean and free of corrosion.
Secure Connections: Make sure all wires and connectors are securely attached.
Fuse and Relay
Locate the Fuse Box: Find the fuse box and identify the fuse and relay associated with the AC system.
Inspect Fuses: Check the fuses for any signs of damage or burning.
Test Relay: Swap the AC relay with a similar relay in the fuse box to see if the compressor engages.
3. Listen for Unusual Noises
Start the Engine
Turn on the Car: Start the engine and let it idle.
Set AC to Maximum: Turn the AC to its highest setting.
Listen for Sounds
Normal Operation: The compressor should make a soft humming noise.
Unusual Noises: Listen for grinding, squealing, or knocking sounds, which can indicate internal damage.
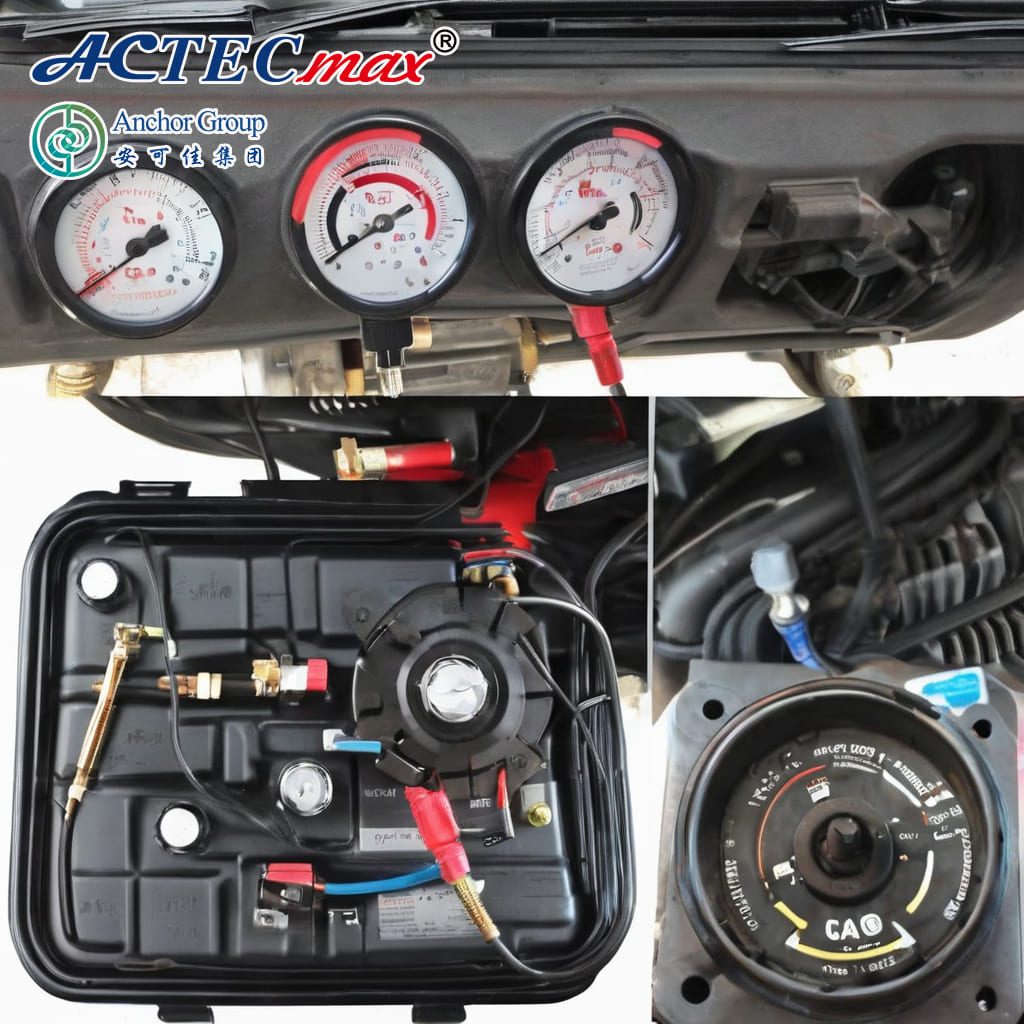
4. Measure System Pressure
Use AC Gauges
Manifold Gauge Set: Connect a manifold gauge set to the high and low pressure ports of the AC system.
Check Readings: Read the pressure on both the high and low sides.
Compare Pressures
Manufacturer Specifications: Compare the gauge readings to the manufacturer’s specifications found in the vehicle’s service manual.
Diagnose Issues: Low pressure on both sides can indicate a faulty compressor or low refrigerant levels.
5. Clutch Engagement Test
Turn On the AC
Start the Car: Start the engine and set the AC to the highest setting.
Observe the Clutch: Watch the compressor clutch to see if it engages and starts spinning.
Check for Power
Multimeter Test: Use a multimeter to check for voltage at the compressor clutch coil.
Correct Voltage: The voltage should match the car’s battery voltage when the AC is on.
6. Test Compressor Operation
AC Performance
Vent Temperature: Check if the air coming from the vents is cold.
Inconsistent Cooling: If the air is not cold, it may indicate a faulty compressor or other AC issues.
Compressor Cycling
Observe Cycling: The compressor should cycle on and off at regular intervals.
Frequent Cycling: If the compressor cycles too frequently, it may indicate low refrigerant or other problems.
7. Voltage Test
Measure Voltage
Multimeter Check: Use a multimeter to measure the voltage at the compressor clutch coil.
Battery Voltage: The voltage should be close to the car’s battery voltage when the AC is on.
Trace Circuit
Check Power: If there’s no power at the clutch coil, trace the circuit back to the AC relay and control system to identify any issues.
8. Check for Blockages
Inspect the Expansion Valve
Expansion Valve: Ensure the expansion valve is not clogged, which can affect refrigerant flow.
Check the Condenser
Condenser Condition: Make sure the condenser is not blocked or dirty, as this can reduce cooling efficiency.
Tools Needed
Manifold Gauge Set: For measuring system pressures.
Multimeter: For checking electrical connections and voltage.
UV Dye and UV Light: For detecting refrigerant leaks.
Basic Hand Tools: Wrenches, screwdrivers, etc.
Tips
Safety Gear: Always wear safety glasses and gloves when working with the AC system.
Service Manual: Refer to the vehicle’s service manual for specific pressure values and detailed instructions.
Conclusion
By following these steps, you can diagnose whether your car’s AC compressor is functioning properly or if it needs repair or replacement. If any issues are detected during these tests, it is recommended to consult a professional mechanic for further diagnosis and repair. Proper maintenance and regular checks can ensure the longevity and efficiency of your car’s AC system.
Anchor Group is a leading supplier of high-quality OEM and aftermarket AC parts and tools for a wide range of vehicles, including cars, buses, and trucks. Our commitment to excellence and exceptional service has made us a trusted partner in the automotive industry. Get Access Now: https://onestopacparts.com/