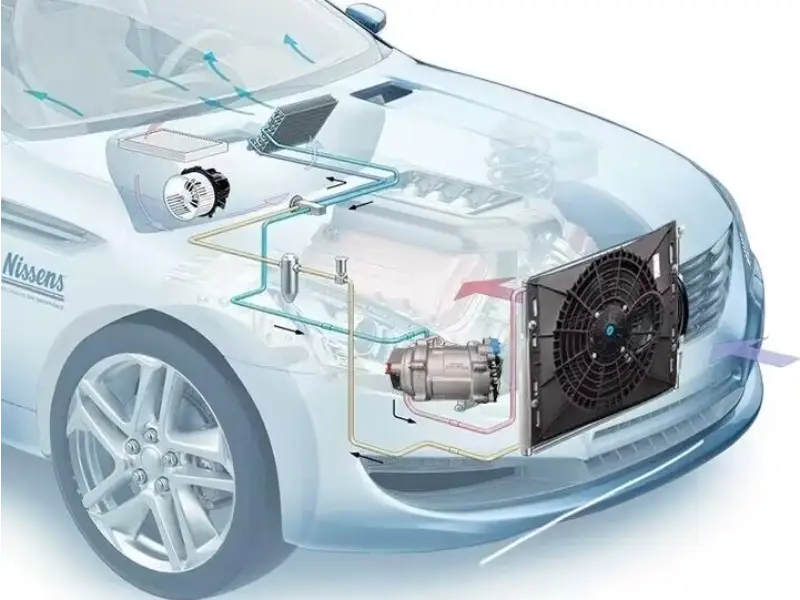
Evacuating your car’s air conditioning (AC) system is a crucial maintenance task that involves removing air and moisture from the system to ensure optimal performance and prevent damage. This guide will help you evacuate your auto AC system at home using common tools and equipment. Anchor Group, a manufacturer of high-quality automotive AC parts, provides reliable tools and equipment for this process.
Tools and Materials Needed
Vacuum Pump: To remove air and moisture from the system.
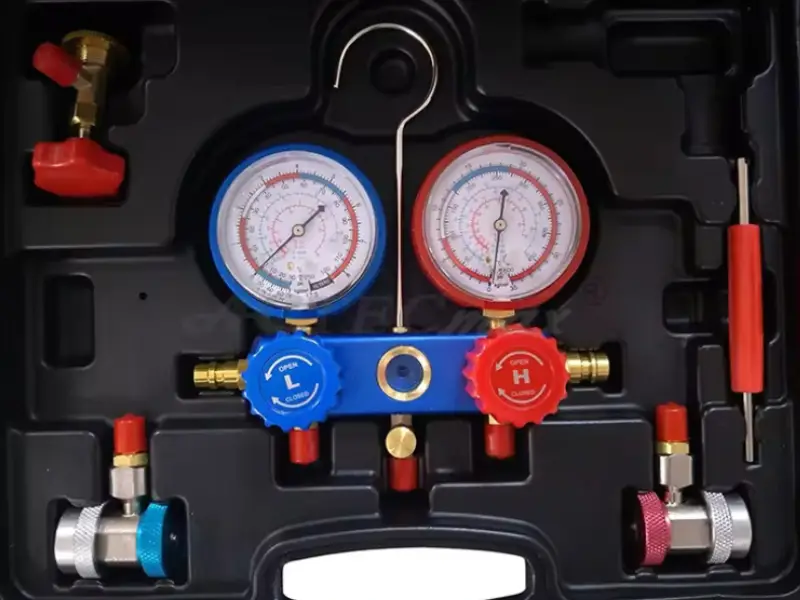
Manifold Gauge Set: To monitor pressure levels and control refrigerant flow.
Refrigerant: To recharge the system after evacuation.
Safety Gear: Gloves and safety goggles to protect yourself.
Steps to Evacuate the AC System
Preparation
Safety First: Wear safety gloves and goggles to protect yourself from refrigerant exposure.
Locate Service Ports: Identify the low-pressure and high-pressure service ports on your car’s AC system. These are typically covered with plastic caps.
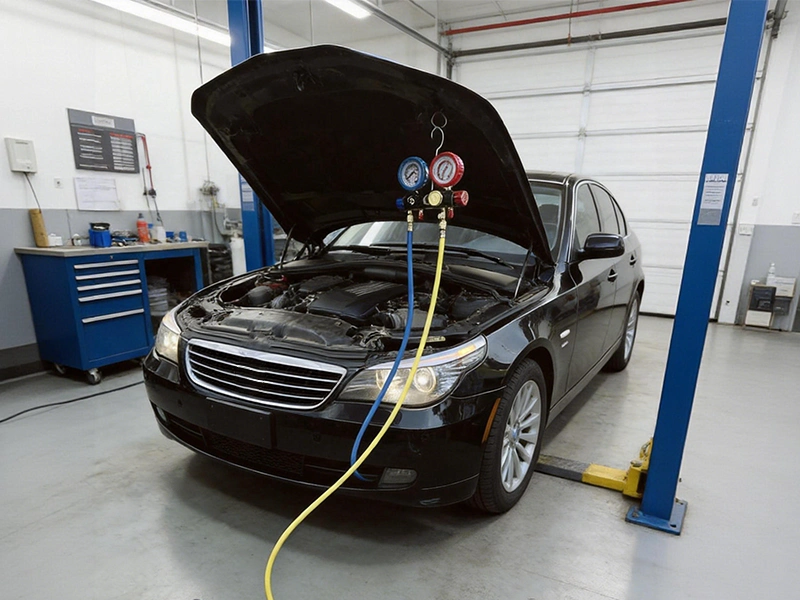
Connect Manifold Gauges
Attach Gauges: Connect the blue hose to the low-pressure port and the red hose to the high-pressure port.
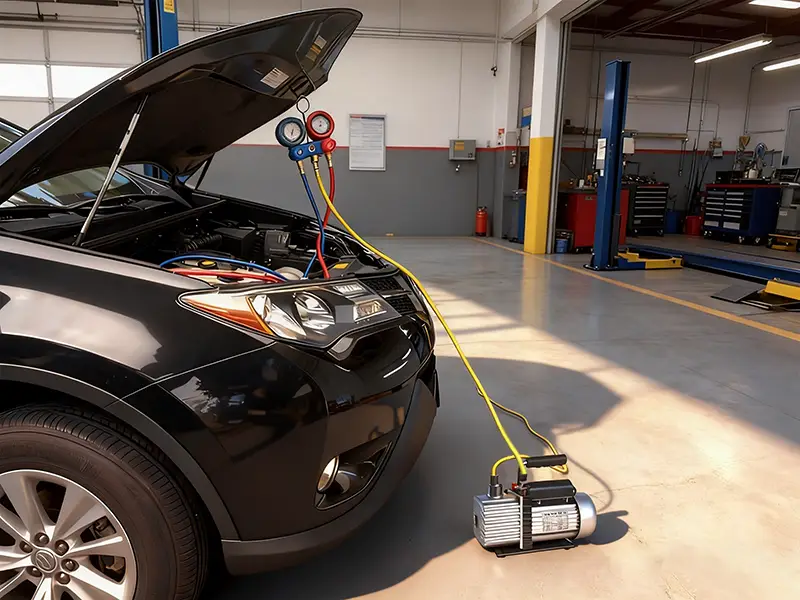
Middle Hose to Vacuum Pump: Attach the yellow (middle) hose of the manifold gauge set to the vacuum pump.
Check for Leaks
Open Gauges: Open both the low-pressure and high-pressure valves on the manifold gauge set.
Run Vacuum Pump: Turn on the vacuum pump and let it run for about 15-30 minutes. The vacuum should draw down to around 29 inches of mercury (inHg) on the low-pressure gauge.
Monitor Gauges: Ensure the pressure holds steady without rising, indicating no leaks.
Evacuate the System
Continue Vacuuming: Let the vacuum pump run for another 30-45 minutes to ensure all moisture and air are removed from the system.
Close Valves and Turn Off Pump: After the evacuation period, close both valves on the manifold gauge set and turn off the vacuum pump.
Check the vacuum: Allow the system to sit for about 10 minutes to ensure it maintains a vacuum. If the pressure rises, there may be a leak that needs to be addressed.
Recharge the System
Disconnect the vacuum pump: Detach the vacuum pump and connect the refrigerant can to the yellow hose.
Purge Air from Hoses: Open the valve slightly to purge any air trapped in the hoses before connecting the refrigerant can.
Open Low-Pressure Valve: Slowly open the low-pressure valve on the manifold gauge set to allow refrigerant into the system. Follow the vehicle manufacturer’s specifications for the correct amount of refrigerant.
Final Steps
Monitor Gauges: Keep an eye on the gauges while charging the system to ensure proper pressure levels.
Test the AC: Once the system is charged, run the AC to check for proper cooling performance.
Disconnect Equipment: Close the valves, disconnect the manifold gauge set, and replace the service port caps.
Safety Tips
Avoid Overcharging: Too much refrigerant can damage the AC system.
Handle Refrigerant with Care: Refrigerant can cause frostbite and other injuries. Always follow safety guidelines.By following these steps, you can effectively evacuate and recharge your car’s AC system at home. Proper maintenance of the AC system ensures it operates efficiently and prolongs its lifespan. Anchor Group, a manufacturer of high-quality automotive AC parts, provides the reliable tools and equipment needed for this process.