Installing air conditioning (AC) in a truck can be a complex process, especially if your truck did not originally come with an AC system. It involves adding various components like the compressor, condenser, evaporator, hoses, and electrical wiring. Here’s a step-by-step guide to help you understand the process:
Step-by-Step Guide to Installing Air Conditioning in Your Truck
Gather Necessary Components and Tools
- AC Kit: Includes compressor, condenser, evaporator, hoses, expansion valve, receiver-drier, and necessary hardware.
- Tools: Basic hand tools (wrenches, screwdrivers), specialty tools (manifold gauges, vacuum pump), and safety equipment (gloves, safety glasses).

Prepare the Truck
- Safety First: Ensure the truck is parked on a level surface with the engine off. Disconnect the battery to avoid electrical shocks.
- Interior Preparation: Remove necessary interior panels and dash components to access the area where the evaporator and other components will be installed.
Install the Compressor
- Mounting Bracket: Attach the compressor mounting bracket to the engine. This may require removing or repositioning other engine components.
- Compressor: Mount the compressor to the bracket and secure it in place. Ensure the pulley aligns properly with the serpentine belt.
Install the Condenser
- Location: The condenser is typically mounted in front of the radiator. This may involve removing the front grille or other components.
- Mounting: Secure the condenser using the provided brackets and hardware. Ensure there is adequate airflow around the condenser.
Install the Evaporator
- Interior Installation: The evaporator is usually installed inside the dashboard. This may involve significant disassembly of the dashboard.
- Mounting: Secure the evaporator in place, ensuring it is properly connected to the ventilation system.
Install Hoses and Lines
- Routing: Carefully route the refrigerant lines from the compressor to the condenser, and from the condenser to the evaporator. Ensure lines are free of kinks and are properly insulated.
- Connections: Use the provided fittings and O-rings to secure the hoses and lines to their respective components.
Install the Receiver-Drier and Expansion Valve
- Receiver-Drier: Mount the receiver-drier in a location that is easily accessible and secure the lines to it.
- Expansion Valve: Install the expansion valve according to the kit instructions, usually near the evaporator.
Electrical Connections
- Wiring Harness: Connect the wiring harness to the AC components, including the compressor clutch, fans, and temperature sensors.
- Control Unit: Install and connect the AC control unit to the dashboard. This may involve integrating it with existing controls or installing new ones.
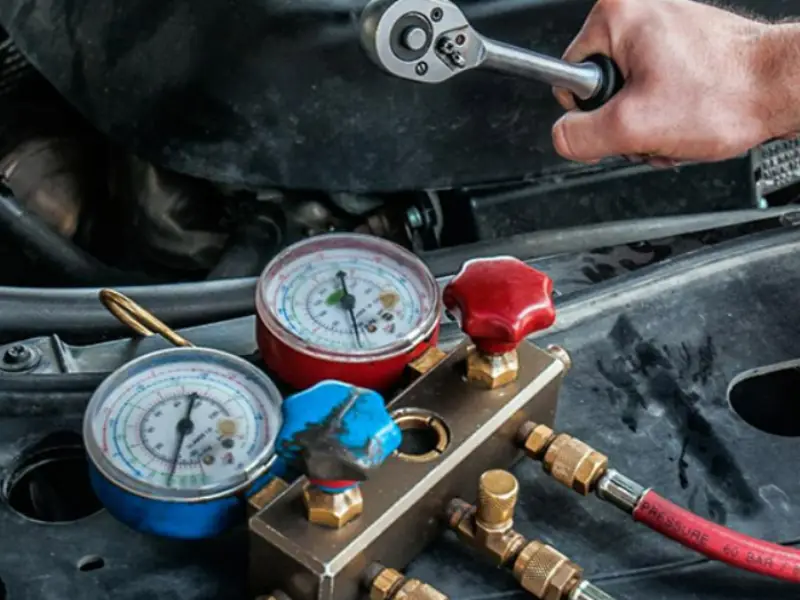
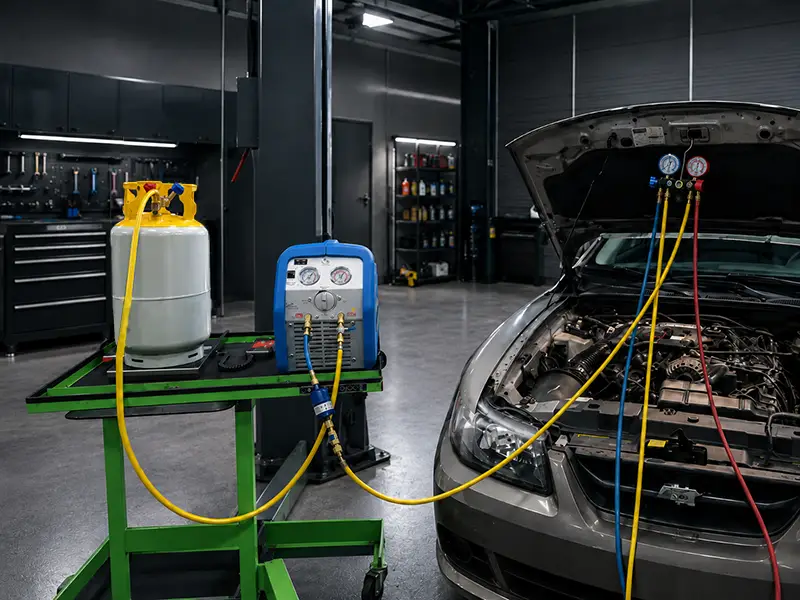
Charge the System
- Vacuum: Use a vacuum pump to remove air and moisture from the system. This step is crucial for the AC system to function correctly.
- Refrigerant: Charge the system with the appropriate type and amount of refrigerant (R134a is common). Use manifold gauges to monitor the process and ensure proper pressure levels.
Also Read: Air Con Recharge for Car: A Step-by-Step Guide
Test the System
- Leak Test: Check all connections for leaks using a leak detection kit or soapy water.
- Operational Test: Reconnect the battery, start the engine, and turn on the AC. Check for proper cooling and ensure all components operate smoothly.
Additional Tips
- Professional Help: If you’re not comfortable with any part of this process, consider seeking help from a professional mechanic.
- Manual: Refer to the specific AC kit manual for detailed instructions tailored to your vehicle.
- Local Regulations: Be aware of local environmental regulations regarding refrigerants.
Professional Manufacturer
Anchor Group is a professional manufacturer specializing in truck AC systems. They provide a range of high-quality components, ensuring the efficiency and durability of your truck’s air conditioning system.
Installing an AC system in a truck is a significant upgrade that requires careful planning and execution. Following these steps and taking necessary precautions will help ensure a successful installation.